This example demonstrates how to leverage test users to evaluate an airline help desk voice agent. We’ll assume the voice agent has access to an internal system that maintains customer accounts.Documentation Index
Fetch the complete documentation index at: https://docs.coval.dev/llms.txt
Use this file to discover all available pages before exploring further.
Goal
Ensure that the airline voice agent books users on the correct flights.Step One: Configure Your Agent Attributes
The first step in testing the agent is to configure a list of test users that exist in the agent’s internal system. These users will be used throughout your test sets. Navigate to the Agent Details page and add the following attributes:user1 is a platinum member while user2 is a standard member. This allows us to compare the agent’s behavior between different user tiers.
Step Two: Create Booking Test Cases
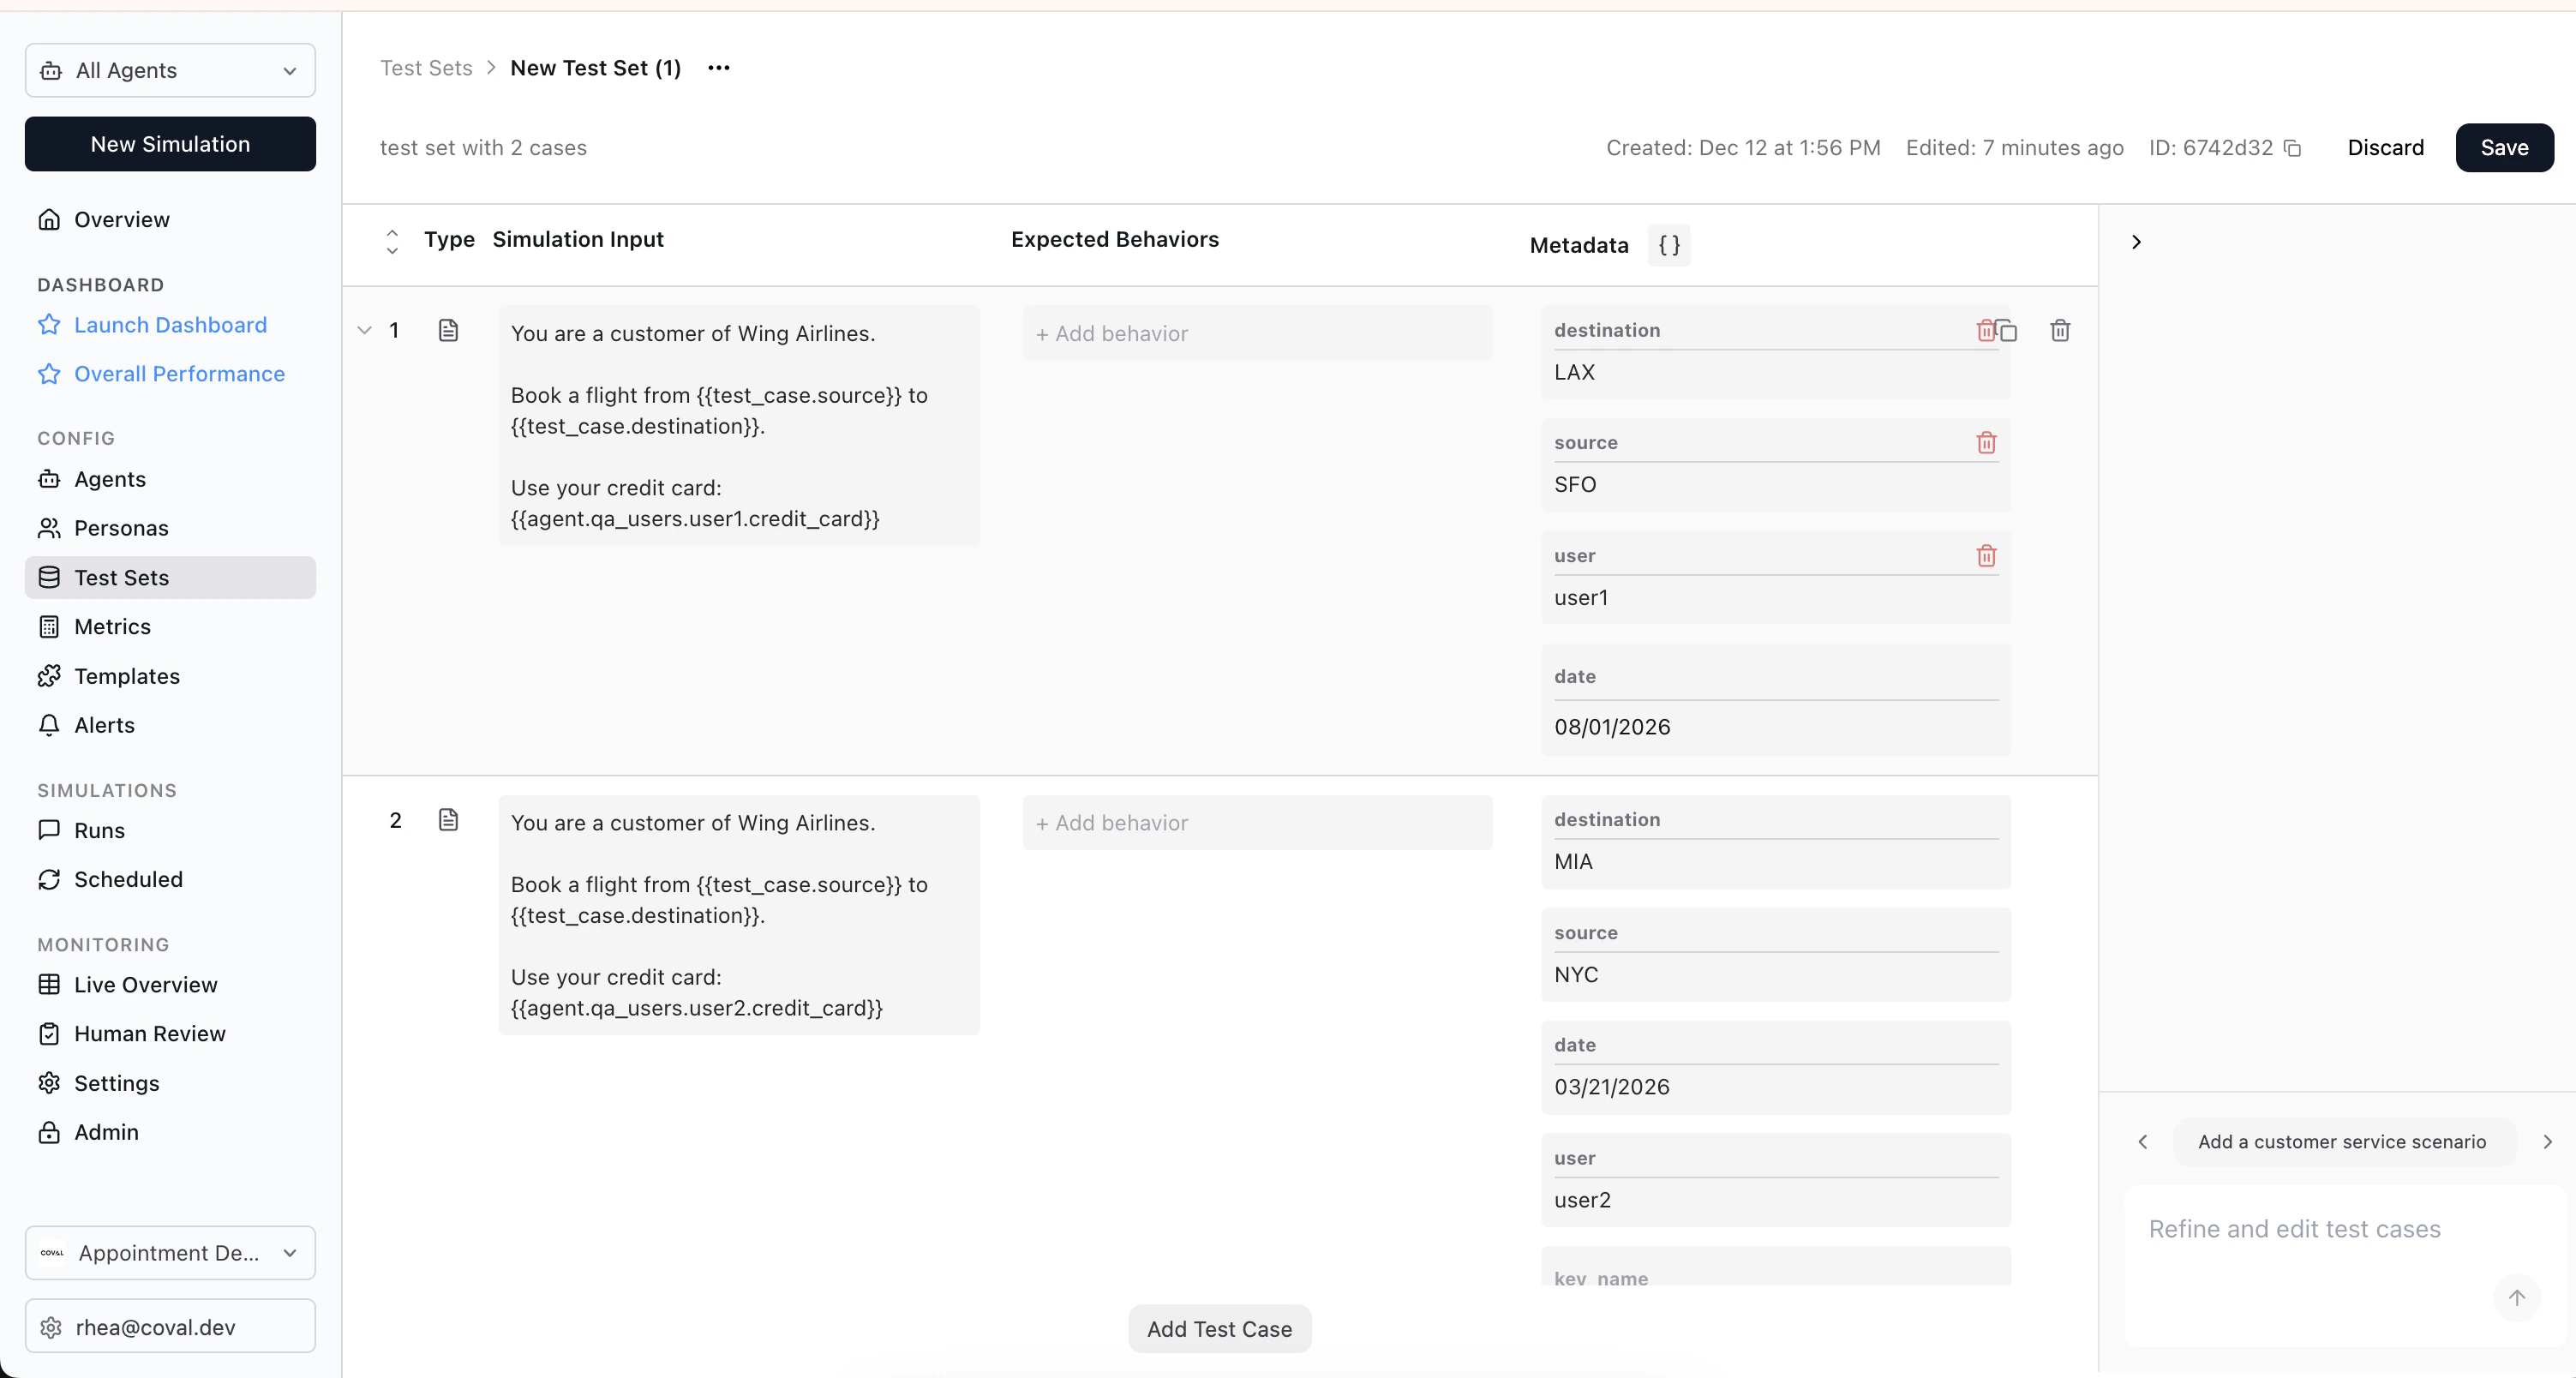
Setting Up Test Case Metadata
The goal of the metadata is to store values we need for deterministic validation. When we create metrics later, we’ll need to know the exact flight path (in airport codes) to perform simple comparisons on the ticket. For this test case, we configure the following metadata:- source:
SFO - destination:
LAX - user:
user1
user field identifies which user account the flight will be booked on, allowing us to verify the booking was made for the correct account.
Test Case Prompt
Step Three: Create an API State Match Metric
After a simulation, we want to check if the airline’s internal database has a ticket for our user. In Step Two, you created a test set with many users and ticket combinations. To do this, navigate to the metric creation page and create an API State Match metric.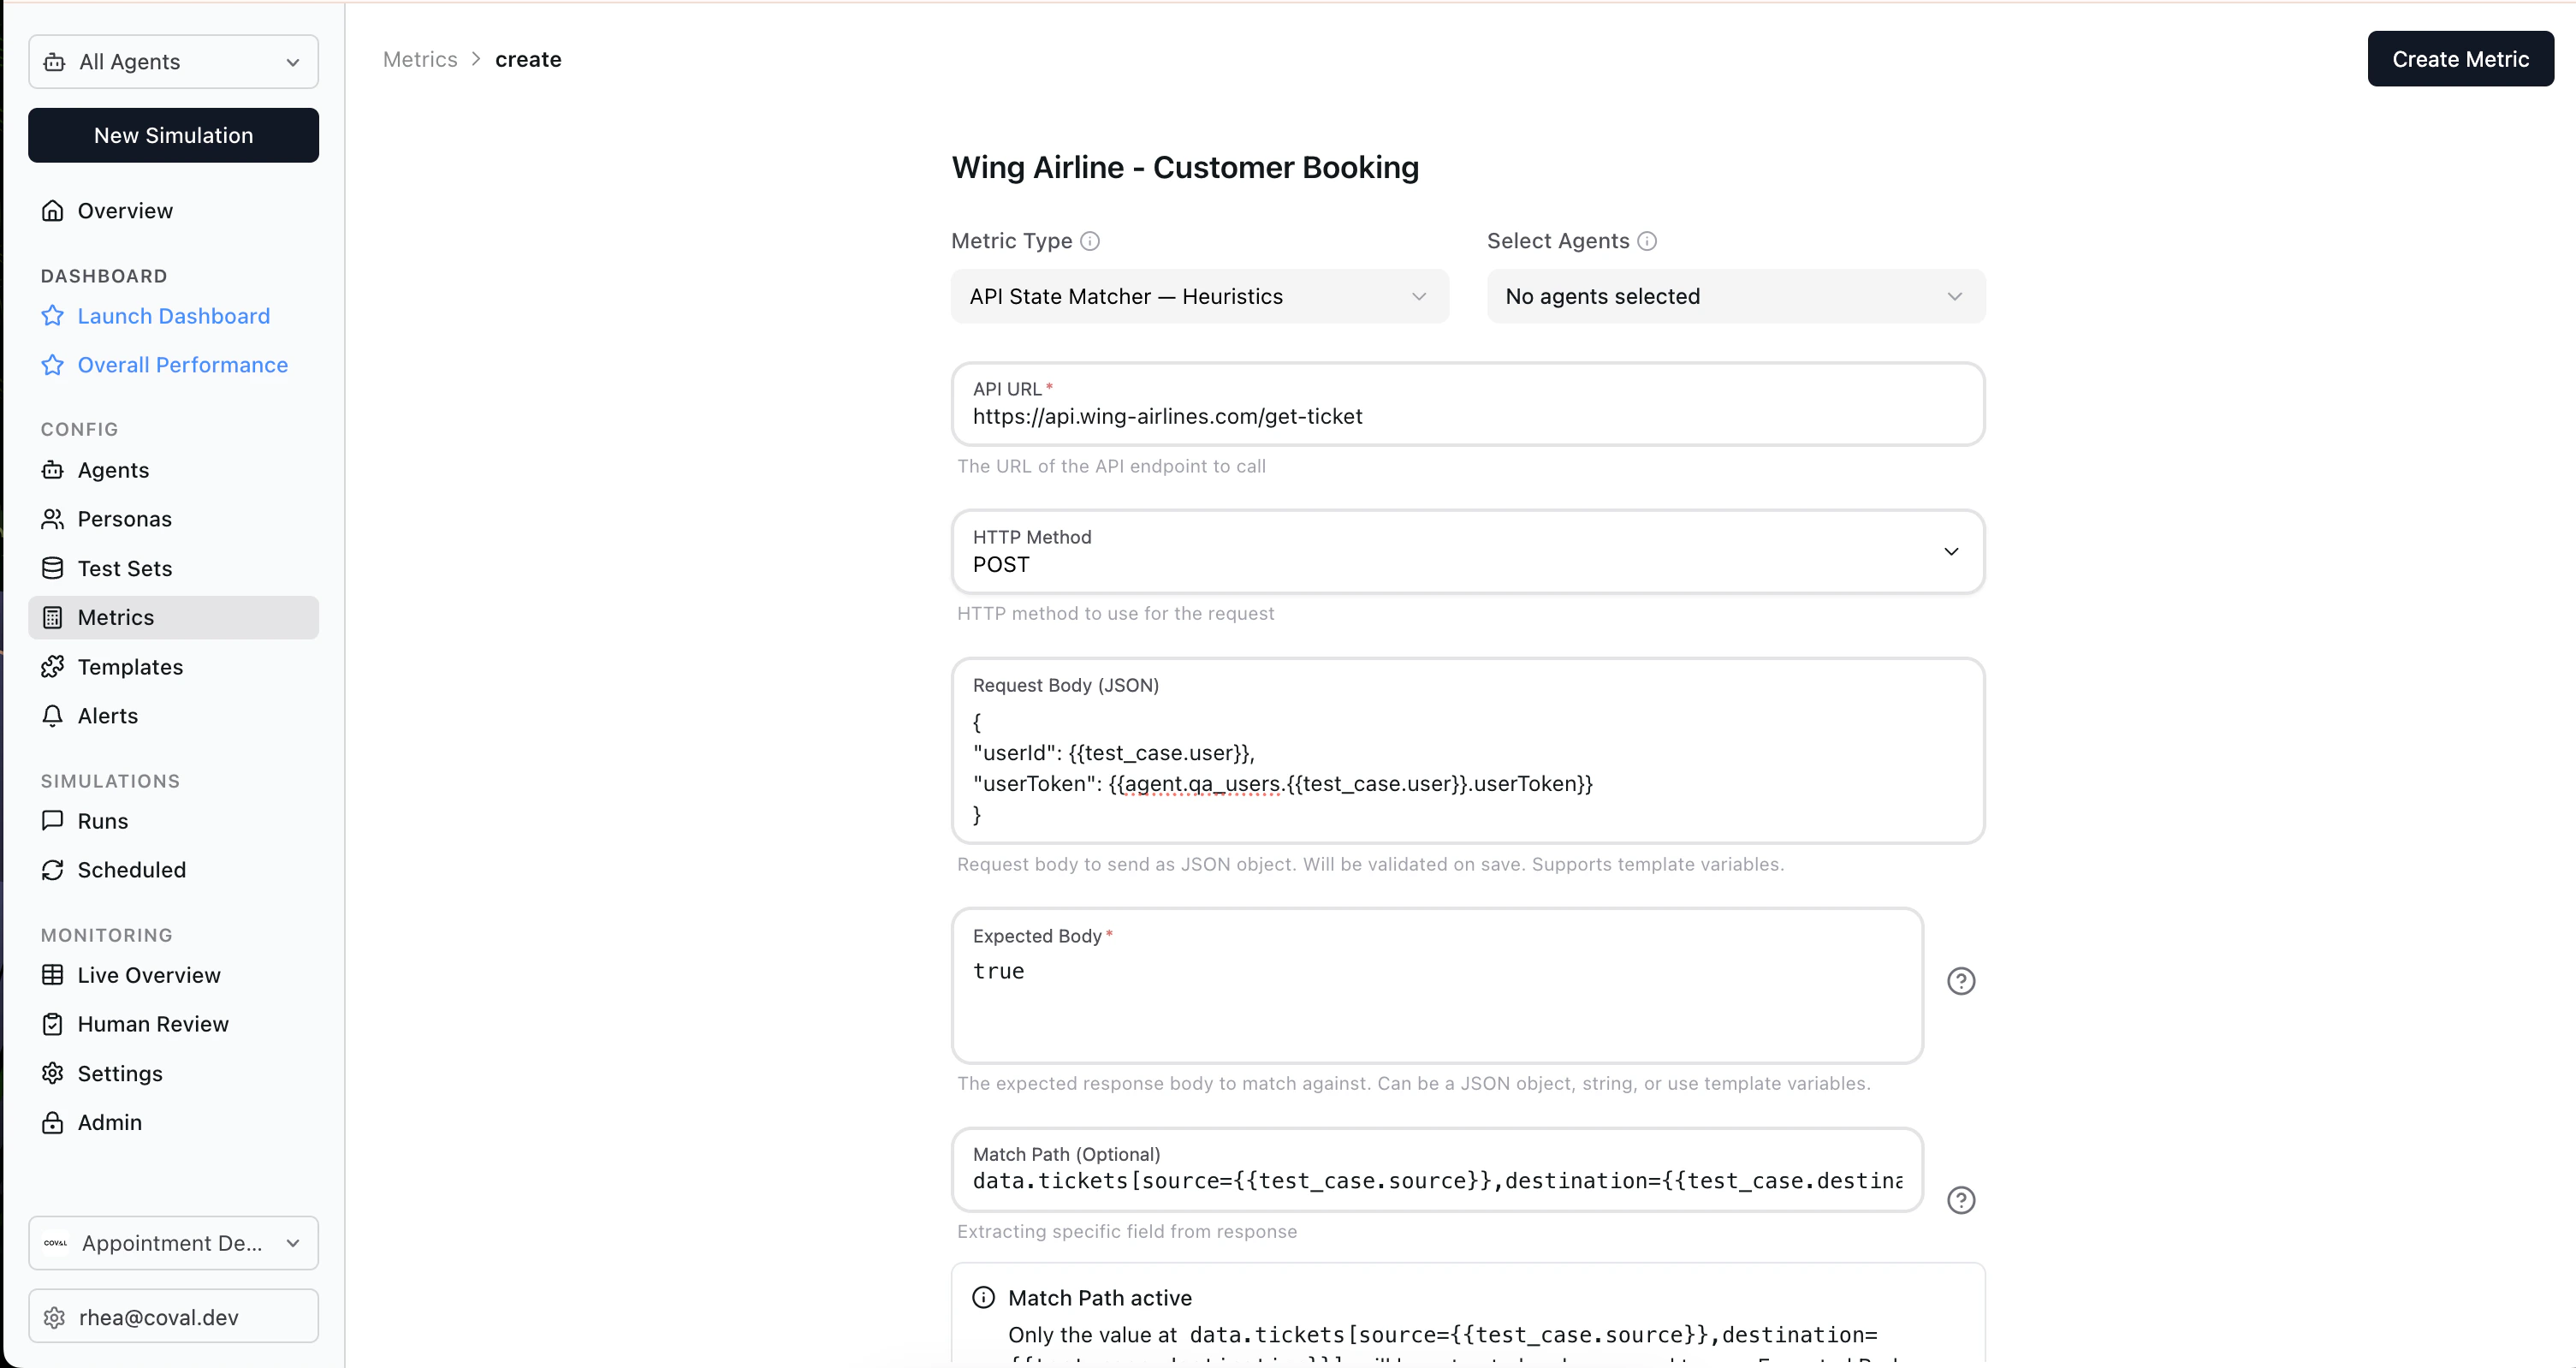
userId and a user_token, and outputs a list of tickets.
After the simulation, we will call the API with {{test_case.user}}, which will be transformed to user1 for our first test case.
tickets[source={{test_case.source}},destination={{test_case.destination}}].confirmed. This will be rendered as, for example, tickets[source=SFO,destination=LAX].confirmed for a given test case. It will select the first ticket that matches both source and destination, and verify the confirmed field.
If the ticket exists, the metric will return MATCH. If the ticket exists but is not confirmed, it will return DIFF. If the ticket doesn’t exist, it will return NOT_FOUND.